Recipes

Killer Garlic Kale Chips

DSC_5030

Kale chips.  It’s one of those things that initiates eye rolls when you mention you love them.  Go ahead and whisper behind my back while I enjoy the amazingly delicious treat I have just made myself from the mother of all health foods…Kale.

I tried buying these in the store once and they were gross.  I’m not even gonna try and say they had any redeeming qualities because I would be lying.  Now, most average people who try a food that activates their gag reflex would just move on and note that in their dislike column.  Not this girl.  I know I like kale because I have it in my smoothies, juices and in my salads. So I viewed my aversion to kale chips as a “challenge accepted” situation.  After several tries and fails, I finally made kale chips my bitch.

I perused tons of recipes for kale chips and most called for a dehydrator. Child please, I can’t drop another few hondo on a dehydrator after my Vitamix and Omega juicer purchases.  Luckily, with a little ingenuity and finesse this piece of equipment is unnecessary.  I’m sorry dehydrator manufacturing people, sometimes the truth hurts.  Dehydrators have their place in greensypants world but not where kale chips are concerned.

This recipe is just awesome.  When I make them they usually get eaten immediately.  I don’t even bother putting them on a plate or in a bowl.  I monge them right off the baking sheet.  Taking pictures for this post posed a challenge for me because I had to wait to eat them.  They have an amazing garlic flavor and just the right amount of crunch.   If you have tried my veggie lasagna you’ll find the flavor a little similar to the “ricotta” used in that recipe.  If you don’t have any experience using cashews as a cheese substitute, I am so sorry.

I was having company one night and decided to make these.  I put out a small plate of them. It was only a small plate because I ate almost all of what I had made.  I was interested to see if anyone would go for them.  Within minutes the plate was empty.  Everyone said, “What were those?  They were delicious”.  Oh you know, just KALE CHIPS!  First came the look of disgust.  Like how could they possibly want to snack on kale chips?  Then the look of confusion took over.  Surely, the only reason they liked them is because they were covered in cheese and fried right?  RIGHT?

Nope.  Actually, my dear family and friends who always make fun of me for eating “weird” stuff, there’s no cheese.  And they are not fried.  How you like me now?

I really think I need to start recording these tricks I play on people and posting them for you.  It is one of my greatest sources of joy.

Anyway, you’re probably wanting me to get on with it and share my secret to kale chippy goodness.  So here you go…

Here is what you will need:DSC_5020

  • 3 bunches kale
  • 1 cup cashews soaked at least 4 hours to soften
  • 1 cup water
  • 2 cloves garlic
  • 2 tablespoons onion powder
  • 1 teaspoon salt
  • 1/4 teaspoon black pepper
  • 1/2 tablespoon nutritional yeast (optional)
  • parchment paper
  • slide off baking sheet (no edges)

The actual process of making these can get a little messy.  Most good things in life are messy so just deal.

Preheat oven to 250 degrees.

Wash and tear kale away from rib in pieces a little smaller than palm size.  Spread pieces out on towel to let them air dry while you make the garlic spread for them.

Drain cashews and add to high speed blender along with water, garlic, onion powder, salt, pepper and nutritional yeast.  I said the nutritional yeast was optional only because you may not have it laying around.  It has a cheesy, nutty flavor and is loaded with vitamins and protein.  It also makes this kale chips go from good to amazing so get it for next time if you don’t have it now.  It can be found in most bulk bins at health food stores and Whole Foods.

Blend mixture until smooth.  If you don’t have a high speed blender, check out How to Choose a Blender and make that your next big purchase.

Here’s the messy part.  Using your fingers, coat each kale leaf with the mixture.  Make sure there isn’t large clumps on the leaves or it will be difficult to get the chips crunchy.  Only a thin layer is needed.  Place the leaves on a sheet of parchment paper that is slightly smaller than the baking sheet you will be using.  They will look something like this…DSC_5025

You can use a large bowl with a lid and add a handful of kale and a spoonful of mixture and shake the bowl but I always find there ends up being a lump of it somewhere and it doesn’t easily spread.  If you really are against doing the leaves one by one you can give that a whirl.

Once your leaves are all coated and on the paper, use your slide off baking sheet to place in oven by sliding paper directly onto middle rack.  You can put as many sheets will fit on the middle rack but do not put any on rack above or below.  The chips tend to cook unevenly that way.  Bake for 10 minutes.  Remove from oven using your baking sheet.  Turn each leaf and place back in oven.  Check them after 8 minutes.  If they aren’t crispy check every two minutes after that.

And there you go. Kale chip perfection.  You’re welcome.

Good to knows:

  • If the chips seem a bit soggy, place back in oven for a few minutes.  I set aside soggy ones from each sheet and put all the late bloomers in together after all my sheets are done.  The kale leaves are all unique in that some are more curly or contain more moisture than others so some may need a little more time to crisp up.
  • If you don’t use all the mixture to coat the leaves it makes an excellent spread for crackers or toast.  It also freezes well.
  • Kids love these!  Well, mine does anyway.
  • Use the left over kale ribs in your smoothies or juices.

Enjoy your new found love for kale chips!

Be sure to like greensypants on facebook and follow on twitter so you know when there is more greensypants info to soak in!  Share with your friends and the green will keep coming your way!

Smooches,

Nikki


Advertisement
Categories: Green Love, Recipes, Uncategorized | Tags: , , | Leave a comment

Buttpaste vs Cancer

DSC_4771Now that I have your attention…

You know how when you are young you would rather die than listen to one word of advice your parents give you?  Yup, that was me.  There was one thing though, that for whatever reason stuck.  My mom would always tell me to wear sunscreen.  This is one of those golden nuggets that you don’t understand when you are seventeen.  As if I’m ever gonna get wrinkles mom, please.  And skin cancer is for old people.  But alas, there I was sneaking into her medicine cabinet generously applying her SPF 30 face cream in the morning (that just shed a whole lot of light on why you flew through that stuff huh, Ma?) .  Here are the words every mother wants to here….Mom, you were right. (I still stand by my tattoo and belly piercing though).

Most of us use sunscreen when we are planning a day outside in the sun.  Really though, you need to be using this stuff everyday.  Even on cloudy days UV rays are strong enough to damage skin.  We all want the easy way out, right?  We want to be able to do barely anything but get huge results.  Well what if I told you there was a way to prevent skin cancer and wrinkles and it’s as easy as putting lotion on everyday?  Oh wow!  How do I do that?  F*ck!ng sunscreen.  Use it.  You will walk for the cure but not put lotion on for the prevention?  Think about that one…

As with any product there are good sunscreens and bad ones.  Ones that are natural and ones that are filled with chemicals.  You’re here on greensypants so you’re looking for alternatives to the mainstream crap you buy in stores.  For some reason we forget that what we put on our body is just as important as what we feed ourselves.  Our skin is our biggest organ and it is porous.  It will absorb what you put on it.  There lots of chemicals that you will see on the back of your sunscreen bottle that could potentially be harmful.

Truth be told, the jury is out on all the chemicals used in sunscreen.  There are some studies that show some of the chemicals, such as oxybenzone, are present in the urine of almost all subjects that applied the sunscreen.  What does that mean?  It means that you put it on your skin and it has the potential to be absorbed into your bloodstream and hang out in your body for a while before exiting through your urine.  What did it do while it was in there?  Maybe nothing, but we don’t really know.  The companies that make products with suspect ingredients always fall back on the old…”We have been using this ingredient in our product since 1970 (or some other seemingly far away year).”  Oh, cool.  You know what there is a lot more of since 1970?  Cancer.  Is anyone able to prove without a doubt these ingredients cause cancer? No.  Is there anyone who can prove definitively and without question that they don’t cause cancer?  Anyone?  Didn’t think so.  There are plenty of studies that show zero adverse affects.  Guess who paid for those studies????  Yeah, the company making the sunscreen.  That’s not a conflict of interest or anything.

I went ahead and listed all of the ingredients in your typical SPF 30 sunscreen that you would buy in the store. Take a look…

Active Ingredients: Avobenzone 1.0%, Homosalate 10.0%, Octisalate 5.0%, Octocrylene 0.8%, Oxybenzone 4.0%

Inactive Ingredients:  Water, Stearyl Alcohol, Glycerin, Caprylyl Glycol, Hydogenated Dimer Dilinoleyl/Dimethylcarbonate, Copolymer, Triethanolamine, Cetyl Alcohol, Xanthan Gum, Sodium Lauroyl Sarcosinate, Disodium EDTA, Dipopylene Glycol, Disodium Ethylene Dicocamide, PEG-15 Disulfate, Glyceryl Stearate Citrate, BHT, Cetearyl Alcohol, Sodium Lauroyl Lactylate, Retinyl Palmitate, Tocopheryl Acetate, Lecithin, Aloe Barbadenisis Leaf Juice, Phenoxyethanol, Methyldibromo, Glutaronitrile, Methylchloroisothiazolinone, Methylisothiazolinone.

Phew. At least I see Aloe Leaf Juice in there!

The active ingredients listed here (zinc oxide and titanium dioxide) are what are referred to as “physical barrier” sunscreens which simply sit on the skin and form an actual barrier from the sun.  The rest of these hard to pronounce ingredients on this label are “chemical barrier” sunscreens.  That means that they are absorbed in the skin and the sun protection is a chemical reaction. There are so many ingredients in most sunscreens to ensure full spectrum light protection.  All those chemicals listed above have different UV rays they filter.  That is really important when using sunscreen.  It’s getting confusing now, I know.

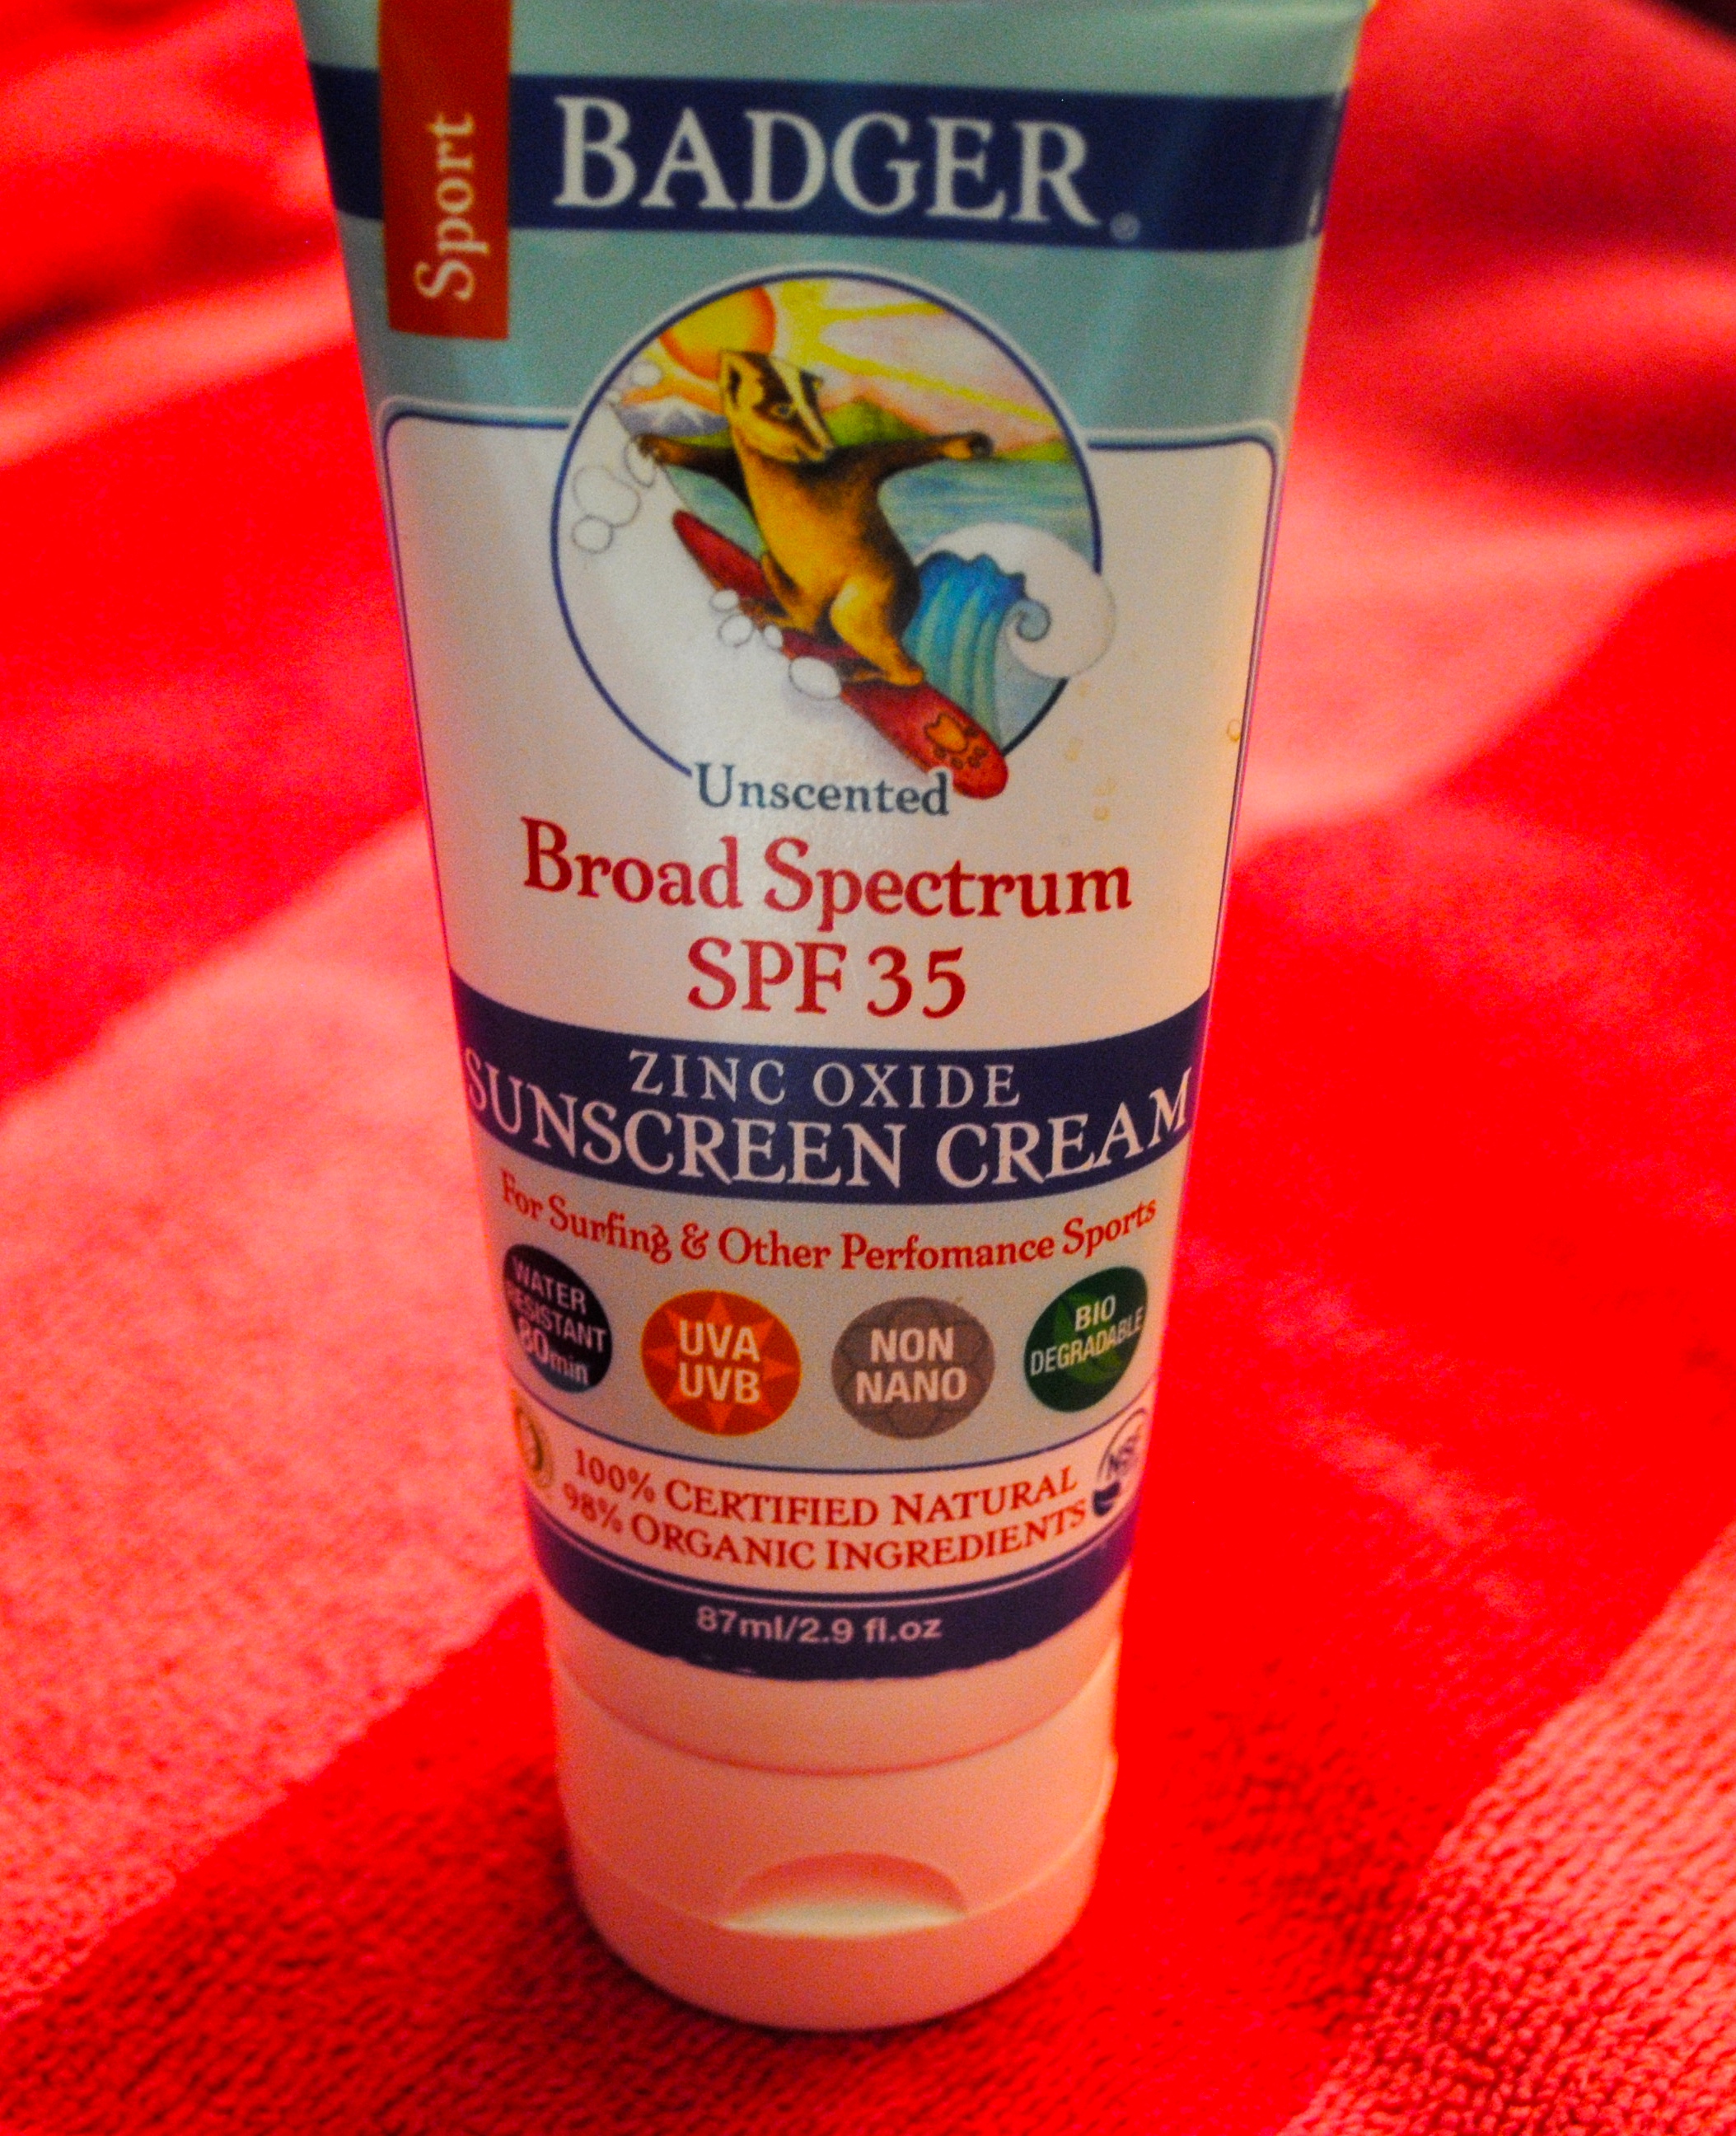
I don’t want to launch into a chemistry lesson and try to explain all these scary looking ingredients.  I wouldn’t be able to if I tried.  Instead, I am going to show you the ingredient list of the Badger brand sunscreen that I use…

Active Ingredient: Non-Nano Uncoated Zinc Oxide 22.5%

Inactive Ingredients:  Certified Organic Sunflower Oil, Certified Organic Beeswax, Certified Organic Jojoba Oil, Sunflower Vitamin E.

Well, isn’t that lovely?

There is only a “physical barrier” sunscreen here.  Zinc Oxide.  The non-nano, uncoated means that the particles in the zinc are big enough that they cannot penetrate the skin and will only sit on top.  Many other sunscreens contain Titanium Dioxide.  This ingredient has recently come under fire.  Here is a good read. The controversy is not in the ingredient itself just in the fact that it’s not always clear if the type of titanium dioxide used is the proper formulation, and therefore, may be absorbed through skin.  Take a gander and you be the judge.  You may want to read the “Nanoparticle Info” at the bottom of this post.

Now, like I said in the past, I’m not about to tell you that your sunscreen may be harmful and then leave you high and dry.  You have options here, loves.  Can you make your own?  Yes.  Do I make my own? No.  Is there a reasonable middle ground?  YES!

DSC_4784Zinc oxide.  It should be listed as the only active ingredient in your sunscreen.  As mentioned above, Badger is my go to store bought brand. It is expensive.  This 3 oz tube pictured on the right cost $14.  Since it is a mineral sunscreen, it is more expensive.  Zinc is an actual earth mineral and is much more expensive than those cheaply manufactured chemicals.  Make sense?  I will say, that I think the Badger is worth the money.  You can purchase it here.  They have sunscreens for kids and adults and tons of other great products.

You can in fact make your own sunscreen by purchasing zinc oxide non-nano powder and mixing up a batch with other ingredients like magical coconut oil and cocoa butter.  The reason I don’t do that is because zinc oxide powder in its concentrated form can be breathed in and damage your lungs.  I don’t want to mess with that stuff.  Don’t let that alarm you.  Regular old table salt would be harmful if it were breathed in as well.  What now?  In true greensypants fashion, I have an answer for you….

Buttpaste.  Yup.  All you mommas and poppas out there will recognize this in the first photo.  It’s diaper cream.  You can use this stuff straight and it costs about half of what the Badger will cost.

Diaper cream is just zinc oxide which is the active ingredient in sunscreen.  It is meant to sit on baby’s sweet little tush and form a barrier to protect affected skin.  It’s all mixed up and ready to use.  No messy lung infecting powder to deal with.  The tube pictured in the first photo is maximum strength, 40% zinc oxide which would give you an SPF of approximately 60. Wowza! That’s a high SPF.  You can use diaper cream straight up on your skin and will have maximum protection.  If you will be using it straight you can go with regular strength diaper cream.  If you want to add some other organic ingredients and make it a little more luxurious on your skin go with the maximum strength 40%.  That will enable you to dilute the cream with other ingredients and still have a high SPF.  Here is a recipe for making your own SPF 30 sunscreen with diaper cream.

  • 1/4 cup (one 4oz tube) of maximum strength diaper cream.
  • 1 tablespoon coconut oil
  • 1 tablespoon cocoa butter
  • 1 tablespoon beexwax

Warm coconut oil on stove top in small pan until melted.  Remove from heat and add other ingredients.  Mix well and place in tube or jar.

Making the recipe will end up costing almost as much as buying the Badger.  I make my own using this recipe and use the Badger.  They are virtually the same.  If I am going to give an honest recommendation I say stick with the Badger brand and avoid the hassle of making your own since the cost is about the same.  If you really want to save money then go with straight up Buttpaste…But…

There is a down side I have to tell you about.  The zinc does not absorb in your skin beautifully.  It will make your skin appear a bit white. It’s not that bad.  Remember that physical barrier talk above?  This white layer is the protection from the sun.  Is this inconvenient? Yes.  Know what else is inconvenient?  Cancer.

I used to be all weird about it in public.  I was so concerned what everyone would say behind my back because I possibly look like I have lotion that needs to be rubbed in. Then I realized…You know what…I’m fighting cancer.  And wrinkles.  Oh, you think I look dumb with my skin protected from the sun?  Let’s compare sun spots in 20 years.  How about that???  I wear my ghost suit loud and proud.  I don’t even care anymore. I’m saying “no, thank you” to cancer.  And another thing…So many people ask me how I have managed to keep my skin looking youthful.  You should see their face when I tell them Buttpaste.  Priceless.

I am not suggesting you look like casper all day every day.  You can put a small amount of the diaper cream in your daily moisturizer for a light UV protection if your sun exposure will be limited and the white won’t be detectable.  It’s a better option than all the age defying creams with the yucky chemical sunscreens.  If you are beach bound and know you are going to be in the relentless sun then spread that $hit all over. If the idea of the white is too much for you to handle in public, use your regular sunscreen and stick to using the diaper cream when you are at home in your own back yard and no one will see you.  Those small changes are better than nothing.  I will warn you though, that’s how I got my start.  Just when I was in my garden.  Now I glow white for all the world to see.

Lather up, bitches.

I’m not just talking about your face.  Spread that $hit everywhere with reckless abandon.  Pay special attention to your face, shoulders and chest.  It may seem like overkill now but you’ll be the sexiest one in the nursing home someday.

I joke about the Casper thing, but really, it’s not that bad.  Just be prepared to take an extra minute to spread evenly.  I put a little sample on my arm for you to see.  The left is the Badger brand and the right is pure Buttpaste.  The recipe above comes out the same as the Badger.

DSC_4785

See?  You can handle that, right?  In do time people will be asking you what you do to make your skin look so amazing.  Add coconut oil to your routine and you are a green force not to be reckoned with.  Read about it here.

Some tips:

  • A little nervous? Use your normal sunscreen and gradually add more and more diaper cream into it.  This way you will at least be using less of the harmful stuff.
  • You can purchase other brands of diaper cream but look at the other ingredients.  Many have some unsavory contents.
  • Go with a diaper cream that is 40% zinc oxide if you are making the recipe.
  • Babies don’t care if they look white.  Use this on your little ones if you have them!
  • As with any sunscreen, re apply often
  • Don’t forget the backs of your hands, that area is the first to show age.

Be sure to like greensypants on facebook and follow on twitter so you know when there is more greensypants info to soak in!  Share with your friends and the green will keep coming your way!

Smooches,

Nikki

Nanoparticle info

A few people have inquired about my awesome beach bag in the first photo.  Here is the link if you want to order one!  Lot’s of colors and patterns!

Categories: Body, Green Love, Product Recommendations, Recipes, Uncategorized | Tags: , , , | Leave a comment

Juicy Freezer Pops

DSC_4682This is not just for the kiddos…Although they do love them.  We all know the freezer pops from when we were kids.  Just the thought of them brings me back to the days of hot summer sun during school breaks.  I systematically would eat the purple first, then orange, then yellow, then red.  Then the worst. Green.  Bleck.  It was a dirty job, but somebody had to do it.  Then they got really creative and added in blue and pink.  Amazing right?  WRONG.

Now, years ago I will say these things weren’t so bad because it was just water, sugar and food coloring.  In comes all these big agra-business firms and then everything started going to $hit.  High fructose corn syrup made from GMO corn, poison food coloring that is turning up positive on allergy tests and linked to behavior problems…the list goes on and on.  Am I the only one who noticed that with the rise of all the crap in our food the incidence of cancer and other horrible diseases has risen too?  Coincidence?  I think not.  What I’m trying to say is, if you are buying freezer pops or any kind of popsicle for yourself or your kids…STOP.  NOW.  If you have any in your freezer, THROW THAT $HIT OUT.

I would never tell you to do something so drastic without giving you some sort of alternative that’s even better than the original.  By now you know me well enough to know what I’m going to suggest.  Make your own!

This process is so incredibly easy.  You are going to need a juicer.  If you have been toying with idea of getting one check out my post on How to Choose a Juicer for some help.  You could also use a blender.  The pops will just have a little more texture but are still amazingly delicious.  Did I write a post on how to choose a blender?  Heck yes, I did. Read it here.  If you have neither then read Blending Vs Juicing to decide which one will suit your needs better and be ready to have your mind blown.

You will also need something to freeze the pops in.  I used Zipzicles in this post but you can also use your standard plastic pop makers found in most stores.  I prefer to use the reusable pop makers since I am, after all, a greensypants, but I have washed out and reused Zipzicles pouches and you can get a few uses out of them.  Zipzicles are BPA free plastic and are reminiscent of those beloved freezer pops you remember as a child.  While I don’t use them all the time they are great for when I just want to make a few pops with juice I have left over and my plastic pop maker is occupied and already in the freezer. You can purchase them here.

Now you have your juicer or blender and your containers of choice for freezing your pops.  Extract or blend your veggies and fruits and just pour into pop molds.  If using Zipzicles, a small kitchen funnel will avoid spilling and swearing.

To maximize the nutrition you are getting from your pops, use mostly vegetables with just a small amount of fruit to sweeten.  In the photos you see here, I used beets and kale in the purple pop, kale, pea shoots and lemon in the green pops and carrots and apple in the orange pop.  Get creative and use things you aren’t sure if you like.  Once mixed with something sweet and frozen it takes on a whole new taste.  If you’re really feeling this whole pop thing, cut chunks of fruit and plop those suckers right in there.

If this is for the kids, don’t go blabbing about how you put kale or spinach or something in their freeze pops.  Talk about buzz kill.  Make them under the cover of darkness and let them try them before you tell them what’s actually in it. They will love it.  Keep the secret if you have to.  Use colorful veggies to make the pops look vibrant just like the garbage you buy in the store.

Good to knows:

  • DSC_4683If using Zipcicles, store upright in freezer so they are easier to open and eat.  I stand them in my other pop maker tray if it’s empty or if I have one already in the freezer that has a few spots open from pops already eaten.  If not I just stand them up in a plastic bowl filled with ice.
  • Set a timer for one hour after you put them in the freezer.  When it goes off take the pops out and give them a shake.  They will begin to separate and the more solid parts will sink.  This will ensure a nice even distribution.
  • Get frisky and add things like hemp seeds or chia seeds.  Oh la la.
  • If using a blender, add some water to make the pops easier to pour.

Enjoy my little greenies!  Until next time…

Be sure to like greensypants on facebook and follow on twitter so you know when there is more greensypants info to soak in!  Share with your friends and the green will keep coming your way!


Smooches, Nikki

Categories: Product Recommendations, Recipes, Uncategorized | Tags: , , , | Leave a comment

Bean and Sweet Potato Tacos

DSC_4739Hey look, I’m talking about food again.  There’s a shocker.  It’s so hard for me to wait to eat things I make while I take pictures to post here.  In case it’s not blatantly obvious by my other posts, I love to eat.

Mexican food is my favorite type of food.  It’s pretty easy to make and is full of fresh ingredients.  This recipe is for the taco (or burrito if you prefer) filling.  You can add any toppings and use any shell you like.  I tried to make it versatile so you could use whatever you have laying around.  You’re welcome.

You should have the majority of this stuff in your kitchen, and the few things you don’t should be in your kitchen.  Get them and we will figure out what to do with them together.  mmmmK?

Here is what you need (serves 6):

3 cups of cooked pinto beans (or 2 cans) drained

3 teaspoons of olive oil

1/2 cup vegetable broth

1 teaspoon smoked paprika

1 teaspoon chili powder

2 teaspoons black strap molasses

2 teaspoons apple cider vinegar

3 garlic cloves minced

2 cups diced sweet potatoes

1/2 medium yellow onion diced

Salt to taste

hard or soft taco shells

any fixings you like

Method:

Set up a medium sized pot and a large sauté pan.  Put half the oil in each and warm over medium heat.

In the pot: Add beans, broth, paprika, chili powder, molasses, apple cider vinegar and garlic. Stir and let simmer about 7 minutes and turn off heat.

In the pan:  Add sweet potato and onion and sauté until potatoes soften and onions start to brown.

Add contents of pot to large pan with potatoes and onions.  Cover and let simmer until potatoes are soft (about 8-10 minutes).  If the mixture begins to dry out before potatoes are done, add more broth.

Build a yummy taco and enjoy!

The one pictured here has shredded broccoli stalk and carrots left over from juicing and some pea sprouts.  I prefer corn tortillas on the grill and some “Sour Supreme” dairy alternative made by Tofutti. Feel free to make some rice and throw that $hit in there too.

Good to Knows:

  • Black strap molasses is loaded with iron.  You can sneak it in most sautés and baked goods undetected.  It can be found in most grocery stores in the health food section or next to regular molasses.
  • Apple Cider Vinegar has amazing health benefits and tons of uses.  Check it out here.  Bragg’s is the brand you want and is found in most grocery stores right near the black strap molasses.  Convenient, huh?
  • If you don’t have olive oil feel free to sub coconut oil.  If you haven’t yet used coconut oil please read this and prepare to be amazed..

Looking for an appetizer for your mexican fiesta??  Try some Guac-A-Mazing

Be sure to like greensypants on facebook and follow on twitter so you know when there is more greensypants info to soak in!  Share with your friends and the green will keep coming your way!

Smooches,

Nikki


Categories: Recipes, Uncategorized | Tags: , , | Leave a comment

Overnight Oatmeal

DSC_4749Oh, you don’t eat breakfast?  SHAME ON YOU!  Seriously.  I am about to go all Jillian Michaels on you.  Believe it or not I am an actual personal trainer. I don’t just play one on the internet.  Nothing would ignite my angry fire quite like a client telling me they don’t eat breakfast.  If they would get to me in the morning and tell me they didn’t eat breakfast I would tell them to go home.  As someone who loves to eat I don’t even understand this concept.  From the moment I’m conscious in the morning, before I even open my eyes, I’m thinking about what I’m going to stuff my face with first.  What’s wrong with you people???!!!

I know time can be hard to come by in the morning.  I get it.  Making a decent breakfast takes time you don’t have.  Lucky for you, I have a solution. Overnight Oatmeal.  It takes a few minutes in the evening before bed and then a minute the following morning.  Breakfast: Done.

There is an ingredient in this oatmeal you may not recognize.  Cha cha cha CHIA!  Yup, same stuff.  Those seeds you lovingly spread on the “pottery that grows” are actually food.  Chia seeds are PACKED with nutrition.  Ounce for ounce, it has more Omega-3 fatty acid than salmon and also has high amounts of Omega-6.  These Essential fatty acids build new cells and aid brain function.  Also, an ounce (2 tablespoons) of chia seeds contains 18% of your daily recommended calcium intake as well as provides 4 grams of protein.  Take that dairy!

Chia seeds are tiny and crunchy.  You can add some to your salads or even put in water.  If they are in liquid they swell up to 12x their size.  They get a gelatinous (yeah, I said gelatinous) texture and can be hard to drink. By putting them in the oatmeal you won’t really know they are there. They have a slightly nutty flavor but it’s very mild and hard to detect.

Here is what you will need:

1/2 cup rolled oats

3/4 cup almond milk

1 tablespoon chia seeds

1/2 teaspoon ground cinnamon

Handful of fresh berries (optional)

1/2 mashed banana (optional)

Teaspoon of honey (optional)

Small (12oz) jar

Method:

Combine oats, almond milk, chia seeds and cinnamon in jar and shake up.  Put in fridge overnight.

Go ahead and tell me you don’t have time for that.

In the morning grab and go. You’ll notice there is a lot of options up there.  Add whatever you prefer. I personally like my overnight oatmeal with a little bit of raw honey and that’s it since I’ve usually already had a little fruit in my juice.  The banana and berries are the ones I’ve tried with this and it’s yummo.  I like mine warmed up for about 45 seconds in the microwave but it’s also good cold.

If you read this and still decide not to eat breakfast it’s over between us.

Just kidding!  I’ll be sad though so just do it.

Note: Chia seeds are becoming more widely available.  They are least expensive in the bulk bins at health food stores.  Keep in mind you only use a tablespoon at most at any given time and a little goes a long way.

Looking for something for din din?  Look no further…Try this Veggie Lasagna!

Be sure to like greensypants on facebook and follow on twitter so you know when there is more greensypants info to soak in!  Share with your friends and the green will keep coming your way!

Smooches,

Nikki

Categories: Recipes, Uncategorized | Tags: , , , , | Leave a comment

Veggie Lasagna with Cashew “Ricotta”

DSC_4665Before I even start this there is something I have to get off my chest.  I am not a chef.  I am not a cook.  I am not a kitchen master, baker, nor do I have any training at all, whatsoever in the food preparation department.  I will also say I don’t like to cook.  Phew, I feel better now.

I can now tell you I LOVE to eat.  All day, everyday, nom nom nom. I think that’s why I like eating vegetables and fruits so much.  Just wash it with my homemade fruit and veggie wash, give it a rinse and done.  Food prepared.  It’s a total of 2 minutes from when I grab something from the fridge or fruit basket til I am grubbing.  Now, that’s efficeint.

When I accidentally discover create something like this veggie lasagna with what’s left of my produce stash at the end of the week I get really excited to share it with people.  I really love when I have people over for dinner and they are scared of what I will put in front of them since I’m always eating something totally foreign to them.  Then I plop this lasagna on their plate and a look of relief washes over them.  Once they start eating it the compliments roll in and they always include something like….”Oh wow, this is good!  I’m surprised you eat stuff like this!”  No clue.  Once they find out there’s no actual ricotta or meat in it they look totally confused and don’t believe me.  Gotcha, suckas!

Making meals that start with fresh food is pretty easy and requires minimal effort.  I’m not making any complicated sauce or cooking meat to a perfect temperature.  I’m chopping veggies and soaking beans and stuff.  Cooking plant based meals is really simple.  It can easily be vegan by subbing vegan cheese and gluten free by subbing gluten free noodles if either of those things are your jam.  I’ve tried it all ways and it’s still good.

So, since I don’t really know anything about cooking lingo and etiquette, I apologize if I don’t explain things in a typical way you would expect from a recipe.  I’ll explain in a way that’s easy to understand.  What I’m trying to say is, if you are a chef or some $h!t like that don’t judge.

The “ricotta” portion of this recipe is made from nuts.  Yeah, you read that right.  Nuts instead of cheese.  Cray, right?  You’ll see.  You will need to soak 1 cup of cashews at least 3 hours to soften them.  You will also need a good blender to get the nuts smooth to achieve that ricotta texture.  If you have the right blender you will be amazed at what the “ricotta” mixture will look and taste like.  If you haven’t already, take a look at the post titled “How to Choose a Blender” if you are in the market for a new one.  If you make the ricotta substitute and it’s all chunky, it’s your blenders fault not mine.

Here is what you will need: (serves six)

Cashew “Ricotta“:DSC_4644

1 cup raw cashews soaked for at least three hours and drained

1/2 cup pine nuts

1.5 tablespoons lemon juice

3/4 tablespoon onion powder

2.5 tablespoons nutritional yeast (it’s very important to use nutritional yeast and not regular yeast here)

1/2 teaspoon salt

3 garlic cloves minced

1/4 cup water

1/2  cup chopped parsley

1/2 cup chopped green onion


Veggie filling:

1 small eggplant diced

1 small zucchini diced

1 small yellow squash diced

28oz can diced tomatoes (freshly diced if you prefer)

Other stuff:

9 lasagna noodles boiled and ready to bake (gluten free if preferred)

Jar of your favorite tomato sauce

1 cup Mozzarella cheese (or favorite non dairy substitute)


First prepare the ricotta by adding cashews, pine nuts, lemon juice, onion powder, nutritional yeast, salt, garlic and water to your blender and blend until smooth.  Remove from blender into a large mixing bowl and stir in parsley and green onion.

Next, add diced eggplant, zucchini, squash and tomatoes to cashew ricotta to make lasagna filling.  It should look like this…

DSC_4661

You’ll notice it looks exactly the same as if you mixed regular old ricotta in there.  The pink color comes from the tomatoes.

In a 8×8 baking dish, layer, sauce, noodles,  and filling.  3 rows of noodles should perfectly fit across dish, just trim off ends if they are too long.  Kitchen shears work really well for cutting noodles.  You can fit three layers in dish then top with sauce and shredded mozzarella cheese.

Bake covered with tin foil for 30 minutes at 350 degrees.  Remove tin foil and continue to bake until cheese is desired doneness, (approx another 10 minutes). I like it when it just starts to bubble.  Be sure to check the center of dish for warmth when you take it out of the oven.  You want that ish to be really warm.  I just shove my finger in there, but if this is for guests you can nudge a noodle over with a butter knife and take a tiny forkful and put the noodle back in place.

DSC_4663

Let set for about 10 minutes before serving.

Enjoy!

Some nifty “good to knows”

  • Once you taste the cashew ricotta you will want to keep stuffing your face with it.  It’s also really good spread on toasted bread or crackers and topped with diced tomatoes in a bruschetta type appetizer. Party pleaser!!!
  • Nutritional yeast has a nutty, cheesy flavor and is rich in protein and B vitamins.  It is inactive unlike brewers yeast used to make baked goods rise.  It’s a really great flavor and works into recipes easily due to it’s flaky texture.  It can be found in bulk bins at most health food stores.
  • Raw cashews are so incredibly versatile and when used correctly can be used in place of dairy in tons of recipes.  After soaking and blending they have an incredibly smooth cream cheese like texture.
  • Between the cashews, pine nuts, yeast, noodles and vegetables you are getting about 12 grams of protein per serving.  So, if you are a member of the protein police you can relax now.

Be sure to like greensypants on facebook and follow on twitter so you know when there is more greensypants info to soak in!  Share with your friends and the green will keep coming your way!  What recipes would you like to see???

Smooches,

Nikki


Categories: Recipes, Uncategorized | Tags: , , | Leave a comment

DIY Fruit and Veggie Wash

DSC_4699I am a full blown germaphobe.  I don’t mind dirt at all, but the idea of germs and things that can make me sick makes me bug out (get it, “bug” out).

I wasn’t always this way.  It was probably becoming a mother in the height of the swine flu epidemic (I don’t know if it was an official epidemic, but it sure felt that way).  This unleashed the crazy in me.  Like, double wash, triple hand sanitizer then anti-germ hand lotion crazy.  Before that I would grab an apple right out of the pile in the grocery store and take a bite.  The idea of that now makes my stomach turn.

It’s really important to clean your fruits and vegetables before you eat them.  Even the organic ones.  Unless you grow it yourself, your food is exposed to all kinds of things along the way before it gets to the grocery store.  And truth be told, the thing that creeps me out the most is produce in stores that other people had their grubby little hands on.  I’ve seen way too many people not wash their hands after using the public bathroom to just nosh on an apple right from the shelf anymore.  Ugh, I can’t even think about it.

So, now you want to wash your produce since I just reminded you that people are gross and don’t wash their hands.  They sell bottles of fruit and veggie wash in most stores.  I dig that.  It’s easy to just grab a bottle of it.  The problem is I go through a 22oz bottle in a little over a week and the stuff costs anywhere from $3 to $6 dollars in the store.  That adds up when you’re a greensypants!

The other problem…the ingredients.  The list of ingredients on most said bottles have some things I don’t recognize.  I don’t enjoy that.  So, to get to the point here…make your own!  It takes a minute or two and costs close to nothing.  Here is what you need:

1 cup white vinegar

1 cup water

1 tablespoon baking soda

1-2 tablespoons lemon juice (optional)

empty spray bottle

That’s it.  An ingredient list like that is what I dream about.  Here is how you make it:

Pour vinegar into a large mixing bowl then add the baking soda.  Remember that volcano you made in 5th grade?  Fizzy, fizzy.  (Kids love this part so get them involved and excited to wash some veggies.  YEAH!)  Make sure you have enough room in the bowl for the reaction.  Stir mixture until all the fizzing stops, add water then stir.  I like to put the juice of a whole lemon into it for fragrance.  You can also use store bought lemon juice.  This step isn’t necessary but the vinegar has a pretty dominating smell.  The lemon is much more pleasant.  Pour the mixture into your empty spray bottle, (a funnel is useful here), and there you go.  The bottle pictured here had some sort of cleaner in it that I dumped out.  It came in a gift basket someone gave to me (sorry to whoever that was).  It’s fine to use a bottle that has had a cleaning product in it if you thoroughly clean it.  You will have to fill it with mild soap and water and just keep pulling the spray trigger to get all the yuckies out of there.  It takes some time but just chill and watch a show or something (kids come in handy here, too).  You just saved like five bucks, people!

You want to spray all of your non peeling produce with this and let it sit for a few minutes before washing off.  With berries and grape tomatoes and such, just put them in a bowl and spray as you move the fruit around making sure you cover all surfaces.  Fill the bowl with water then toss in a strainer.  Avoid using on cut fruits and vegetables like squash or zucchini since it will absorb the mixture.  It’s not harmful in the least but it will alter the flavor.  Wash before you cut!

Now go wash some whole, real food and get chomping!

Be sure to like greensypants on facebook and follow on twitter so you know when there is more greensypants info to soak in!  Share with your friends and the green will keep coming your way!

Smooches,

Nikki


Categories: Green Love, Recipes, Uncategorized | Tags: , , | Leave a comment

Guac-A-Mazing.

DSC_4680I used to hate avocado.  “Hate” is a word I rarely use because it’s so ugly.  But for reals, I hated it.  I don’t know if it was the color, texture or taste, but I wanted no part of it.  If I ordered a veggie burrito somewhere and avocado was in there it ruined my day.  Serious crankypants mode.

I was in the produce section at the grocery store and passed by the avocados.  Suddenly something weird happened.  I thought…”Hmm, I wonder if I should try to make guacamole’?”  What?  No.  That can’t be right.  But, it feels right.  Let’s do this.

I’ve said it at least three times here that your taste buds will change once you start getting rid of some crap in your diet and replacing it with real food.  Avocado was the first experience I had with this phenomenon.  I think my body was craving fat.  When you get to the point where you are nourishing your body with REAL food, (vegetables and fruits in their whole form), your body will start telling you what it needs.  It’s a really neat little gadget, that body of yours!

I looked up a recipe on my phone right there in the store.  Avocados, onion, tomatoes, cilantro…Wait cilantro?   Bleck.  I always thought cilantro tasted like soap.  Well, let’s just try it.  I can always leave it out of the recipe.  Lime, garlic,  and salt.  Ok, got it all. So I went home and followed the recipe.  It was pretty good.  I decided to make a few changes the next time I made it.  AMAZING!  I eat guacamole almost every day now.  I even toss a whole handful of cilantro in there.  I know, I can’t believe it either.  When I have that healthy fat I have more energy and I feel full after meals.  What’s better than that?!

Here is a recipe for two servings. Unless you are me and you devour all of it…

Ingredients:

2 AvocadosDSC_4668

1/3 cup onion, chopped

1/3 cup tomato, chopped

1/3 cup cilantro (or more!)

3 garlic cloves, minced

1/4 teaspoon salt (more to taste)

Dash or two of  ground cayenne pepper

Half a lime, squeezed

Peel and pit avocados.  Use a mixing bowl to mash coarsely.  I like to use my handheld potato masher.  Add in onion, tomatoes, cilantro and give a stir.  Add garlic, salt, cayenne and lime.  Stir until desired consistency.

Enjoy!  You want to serve this right away!

Looking for a filling meal??  Check out the Veggie Chili post!

Coming soon…DIY fruit and veggie wash!

Be sure to like greensypants on facebook and follow on twitter so you know when there is more greensypants info to soak in!  Share with your friends and the green will keep coming your way!

Smooches,

Nikki


Categories: Recipes, Uncategorized | Tags: , , , | Leave a comment

Gettin’ Juicy With It

DSC_4666We all knew this was coming. I hope you’re all as excited as I am.  We are talking JUICING!!! I really didn’t start juicing until recently.  Shocking, right?  I wanted to start sooner but I was so in love with blending I kind of felt like my Vitamix might get jealous if I start bringing a juicer around.  I was feeling like I wanted to try a juice fast, so I had a talk with my Vitamix and explained that there was going to be a juicer arriving soon and I will love them both the same amount, just in different ways.  Now I know how it must feel when you are having child number two.

Juicing is a pretty big deal right now.  I think that’s swell.  Anything that gets people interested in being healthier is fine by me.

Many people claim juicing has cured all kinds of ailments, from acne and other skin conditions to neutralizing ulcerative colitis.  That’s pretty powerful.  I don’t know about all that jazz, although after watching the documentary SuperJuiceMe!, and seeing what it has done for myself personally, I’m pretty much convinced.  There are plenty of other benefits that are obvious soon after you start to get your juice on.  It’s been known to slow the aging process, regulate the bowels (ahem), and of course, help with weight loss and maintaining a healthy weight.

I’m not talking about juice you buy at the store.  Even those really convincing ones that are all grainy and veggie looking.  No, no my dear.  Those have added sugar and have been pasteurized.  In other words, on top of being full of sugar they are also nutritionally void.  Those marketing people sure are clever though.  Let’s just say for arguments sake you could buy a real extracted juice in the store that has absolutely nothing added to it.  By the time it leaves wherever it was squeezed, makes a long journey on a truck and sits on the shelf in the store until you buy it, it’s lost all its’s benefits.  All of the minerals, vitamins, antioxidants, and enzymes have been oxidized (damaged by oxygen).  When we see the words “minerals”, “vitamins”, “antioxidants”, and “enzymes”, we know those are all good things but we don’t always know exactly what they are…

Vitamins: Organic compounds that can only come from food and the sun.  There are 13 essential vitamins.  Vitamin A, eight vitamin B’s, and vitamins C, D, E and K.

Minerals:  Plants take minerals from the soil and turn them into compounds that our bodies can absorb.  Isn’t that nice of them?  Always wanting to help us, those plants.  Macro minerals like calcium and potassium are the biggies and then there are trace minerals like copper, iron and zinc.

Antioxidants:  These guys fight off free radicals.  Free radicals float around and damage cells and accelerate aging.  Antioxidants show those little a$$holes who’s boss.  You’re the boss.  Antioxidants work for free so hire as many as you can.  Drink your juice, people.

Enzymes:  These little powerhouses are the catalyst for every reaction in the body.  Sounds pretty important right?  Enzymes are plentiful in raw foods and cooking food changes the structure of them making them less effective.

Drinking green juice will give you an instant shot of  vitamins, minerals, antioxidants and enzymes right to the cells.  Zing!  Wow that’s good!  Much like blending, the flavor can be a little strange at first.  Starting with milder vegetables and using some fruit will make it easy to fall in love with juicing.  Notice I put the word “green” in bold.  Juicing mostly fruit or vegetables with a high sugar content isn’t doing a whole lot for you.  Sugar is still sugar.  When consuming fruit or sweet vegetables in their whole form it’s no big deal.  Concentrating it into juice is a little intense for the system so use them sparingly.  The green portion of the juice is where the magic happens.  The fruit and sweet veggies like carrots and beets can come along for the ride but they have to squeeze in the middle of the back seat between the cucumber and kale.  A good rule of thumb is at least three green vegetables to one fruit, then some citrus to cut the bitterness of the greens.  For example:

1 Cucumber (peeled if not organic)

2 Large Kale Leaves or 2 Cups Spinach

3 Stalks Celery

1/2 a lemon, peeled

1 Small Green Apple

This is a great starting point.  It won’t yield too much juice and allow you to get a taste of what we are working with.  If you are scared $h!tless this will help you ease in.  There’s lots of time to add all kinds of super amazing items in the future.  You will end up wanting more and more.

To give you an idea of what a full size juice looks like, here is an example of what I had this morning…DSC_4652

Just look at the picture above and imagine eating all that at once with no dressing or anything to dip it in.  Yeesh, that’s a lot.  It would probably take me a while and I love raw vegetables.  Now look at a glass of all this goodness juiced…  DSC_4669That’s 12 ounces (1.5 cups).  I can take that down in a few minutes and the energy and nutrients are being absorbed almost instantly.  From the moment I started washing the ingredients until I was done cleaning the juicer it took me twelve minutes.  That’s less time than it takes to go through all five lives in Candy Crush.  You got this.

I used to drink energy drinks (hangs head in shame).  I loved that boost but my heart rate would accelerate and there were times I thought I might just have a heart attack. No more of that!  Green juice to the rescue.  Squeeze me out some liquid green and I’m ready to tackle my day.  The best part is no inevitable crash after.  Bonus!

What about the pulp?  After juicing you are left with a bucket of fiber.  But, isn’t fiber good for me?  Of course it is!  Fiber itself doesn’t have nutritional value.  It’s just meant to help “move things along” if you know what I mean.  It’s a bulking and binding agent that makes it easier to get biz done on the throne.  You want to drink your juice on an empty stomach.  Drinking juice with an empty belly means you don’t need to worry about helping anything along.  The juice will get absorbed.  You need fiber for sure and you’ll get it because you’re tons of other healthy stuff like beans and whole fruits and vegetables, right?  You may even be blending.  Wink, wink.

Here’s some juicy tips:

  • Run the pulp through your juicer for a second pass.  Get every last, delicious drop.
  • You are left with this pile of fiber pulp.  No need to be a wasteypants and throw it away.  You can add it to baking recipes, leave it outside for the birdies, or even better, compost it!  Will I be posting something on composting? Does a bear $h!t in the woods?
  • Drink your juice in the morning on an empty stomach or in the afternoon a few hours after lunch.  Give it a nice open highway to get to it’s final destination…your cells.
  • Store your juice in mason jars (as full as possible) in order to minimize exposure to air.

Ready to bask of the glow of green juiciness?  Well, you need a juicer!  Stay tuned for a post on “How To Buy a Juicer” for the low down.

Are you enjoying greensypants??  Be sure to like greensypants on Facebook and follow on twitter!  Share with your friends and tell me what greensypants should talk about next!

Smooches,

Nikki

Categories: Green Love, Recipes, Uncategorized | Tags: , , , | Leave a comment

Veggie Chili

DSC_4683

Get ready for some serious nomming.  All of my recipes start with things I throw together with whatever veggies I have laying around. This is one of my favorites.  I make a big ol’ bucket of it and have it for days.  It’s also a crowd pleaser so it’s great to make for din din if you have people coming over.  This recipe makes about eight meal size servings.  Every time I make this for a friend they ask me for the recipe.  The problem is really have no clue how to make it because it’s just floating around in my brain and I never bothered to write it down.  So I just made it special for you guys and took pictures.

Here is what you need:


Ingredients

2 tablespoons olive oil

4 cloves of minced garlic

1/2 sweet onion chopped

2 large or 3 small peppers (red, orange or yellow) chopped

1 and 1/2 teaspoons ground cumin

1 teaspoon chipotle powder

1 medium zucchini chopped

1 can tomato paste

48 oz diced tomatoes (1 large and 2 small cans or dice yourself)

1 can pinto beans (1/2 cup dry beans if making your own)

1 can black beans (1/2 cup dry beans if making your own)

2 cups water

salt and pepper to taste

Now, I included canned conversions here.  Obviously I’m going to tell you it’s best to prepare your own beans and tomatoes but, realistically, ain’t nobody got time for that.  I mean, I have time for that but you may not.

Method

In large pot on medium heat add oil and garlic until warm.  Add in onions and sauté for about 2 minutes until they start to soften.  Add in peppers and sauté another 3-4 minutes.  Add cumin and chipotle powder and coat vegetables and continue to stir for 2 minutes until you start to smell the spices.  Next add in the tomato paste and zucchini and stir until the paste gets a deep red color (about 3 minutes).  It should look like this…DSC_4684

Add in tomatoes, beans, water and salt and pepper.  Turn up heat and bring to a boil.  Quickly turn down to low heat and simmer for 20 minutes.  You can leave it on longer if you want really soft veggies, but I like them a little firmer.  The more vegetables are cooked the more nutrients they will lose so don’t leave in on the stove forever.  Don’t ruin my recipe, okay?  The reason I wait to add the zucchini is because different cooking times for veggies in the same dish results in different textures.

Add the toppings you like. I like a spoonful of “Better than Sour Cream” non-dairy alternative to sour cream and some blue corn baked chips.  If you like it really spicy some jalapeño or just some extra chipotle powder or cayenne will get the job done.  That chipotle powder has a kick though so taste it first before you go tossing handfuls of fire in there.  Enjoy!

DSC_4687What would you like to see a recipe for???  Reply below or email me at nikki@greensypants.com and you shall receive!  Don’t forget to like Greensypants on Facebook and follow on twitter so you know when there’s so new greensypants info to soak in!

Smooches,

Nikki

Categories: Recipes | Tags: , , , | Leave a comment

Create a free website or blog at WordPress.com.